Realms Management
Realm is the highest possible layer of abstraction for controlling authentication of users and its groups. We can create multiple Realms with multiple providers.

Every application has one realm called Admin. All users in the realm have administration privileges.
Realm View
On the Cluster page click on the Realms section in the left menu sections. 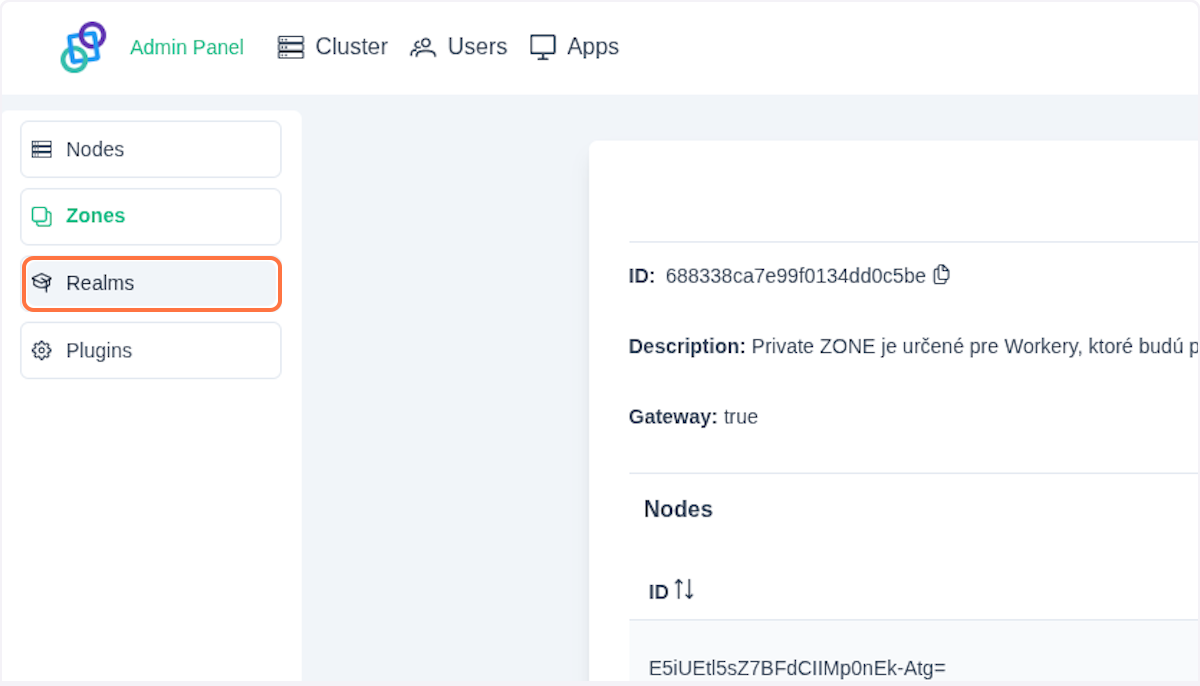
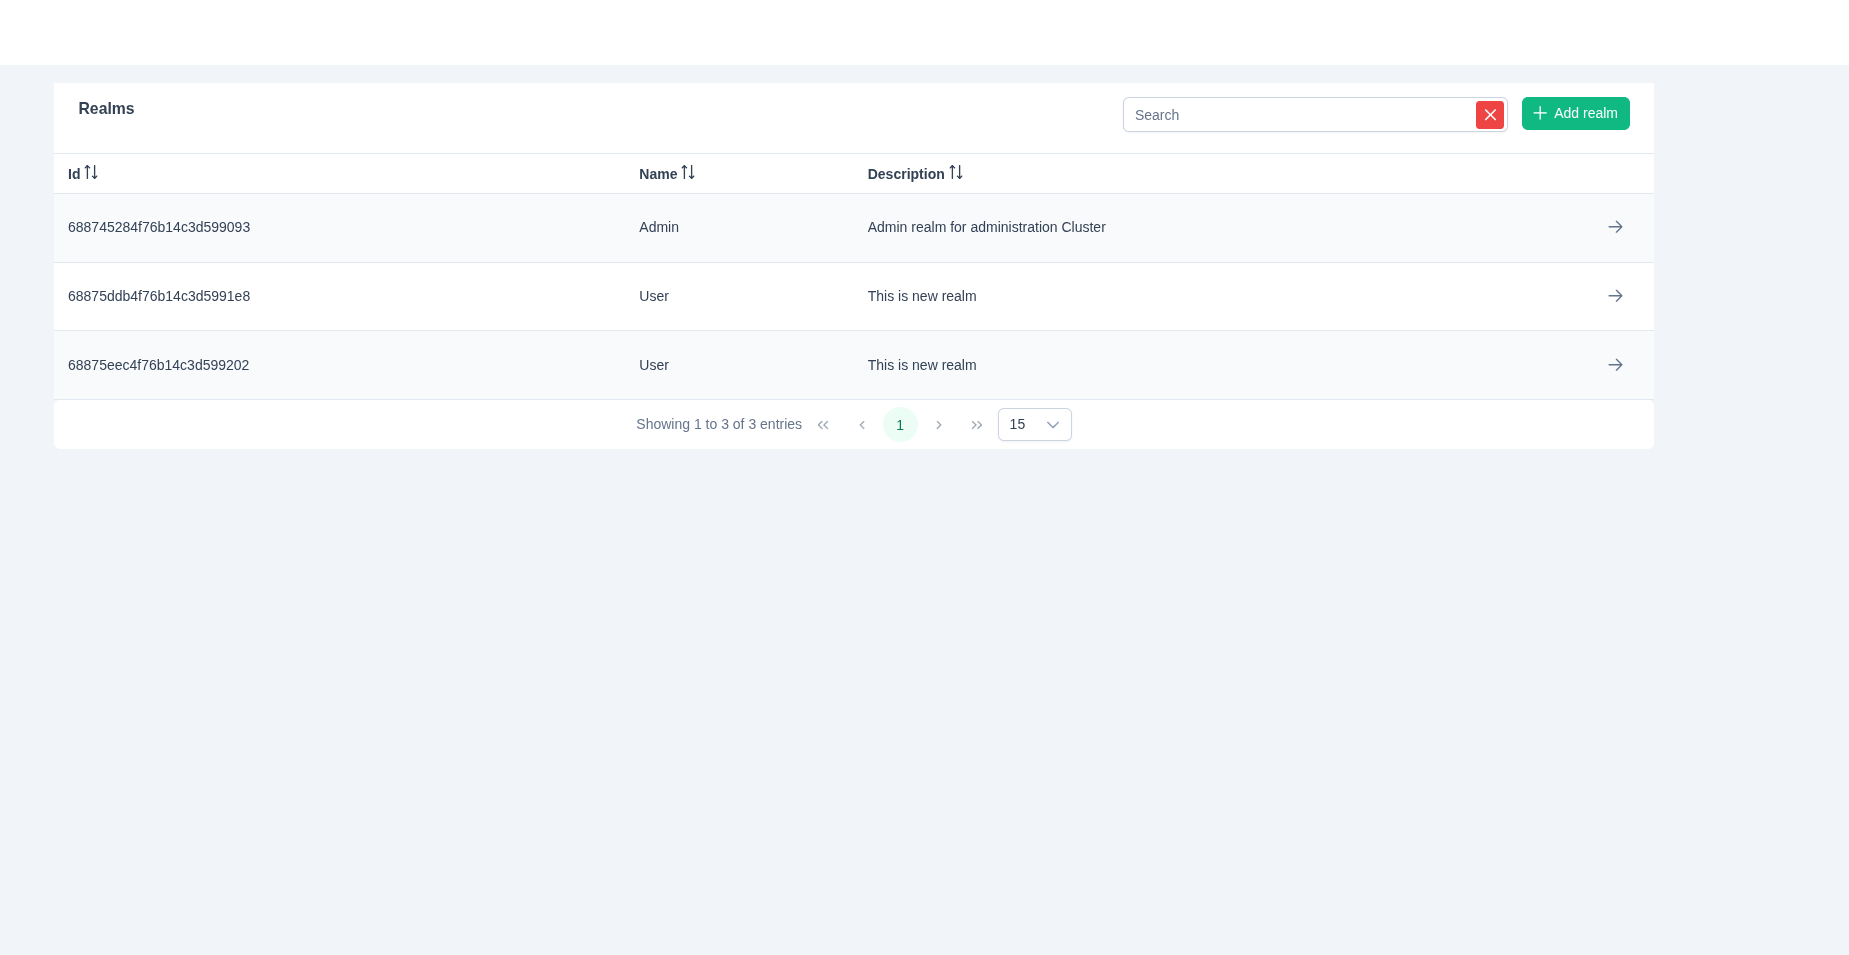
In the chosen view you should see the table containing all existing realms. At the top of the page is an information panel, which shows general information such as realm Id, Name and Description.
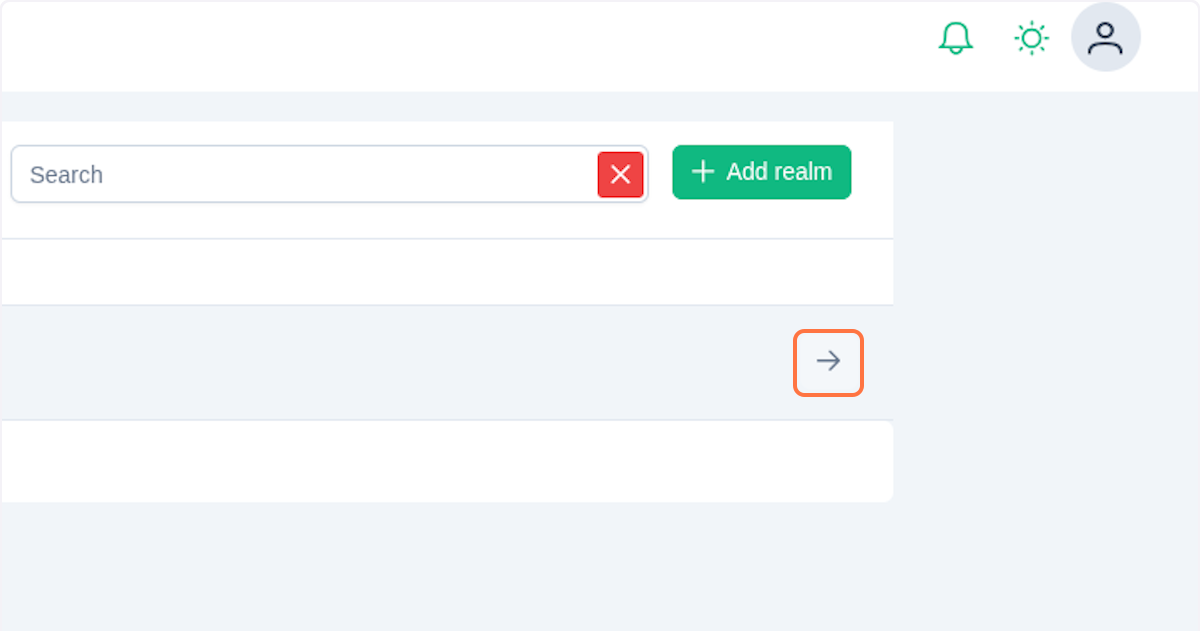
Click on the button in the table entry.
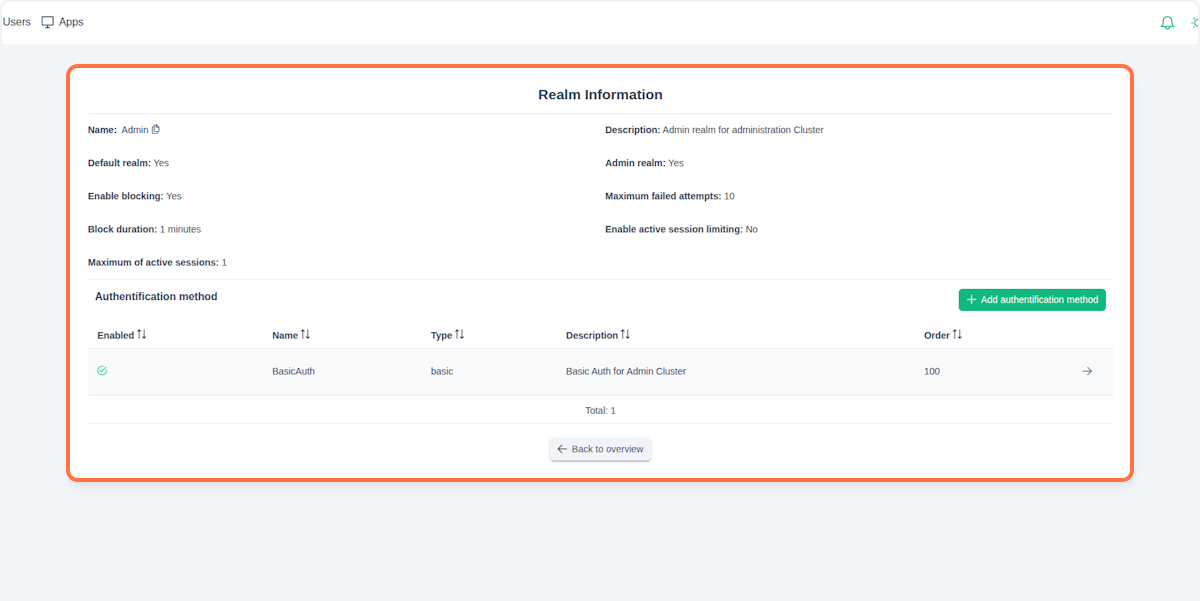
The realm detail view should now be displayed. Here you can find additional information about the selected realm:
- Admin realm: Indicates whether the realm is an administration realm
- Maximum failed attempts: Maximum number of allowed authentication attempts
- Default realm: Indicates whether this realm is the default for incoming connections
- Enable blocking: Controls whether connection blocking is enabled
- Block duration: How long a user is blocked after reaching the maximum number of failed attempts
- Enable active session limiting: Indicates whether the realm has a defined maximum number of active sessions per user
- Maximum of active sessions: Maximum number of allowed sessions per user (Enable active session limiting must be enabled); oldest session is replaced by the newest one when the limit is reached
NOTE
Each cluster starts with the Admin realm. This realm is the default one, meaning that all authentication requests not contaning realmId will default to this realm or to any other realm configured as the default.
{
  "username": "peter@lipa",
  "realmId": "", // defaults to Admin
  "password": "**********"
}
Below the panel with the detailed information, you will find a table of authentication providers. In this table, you can manage every aspect of authorization with your realm.
Create a New Realm
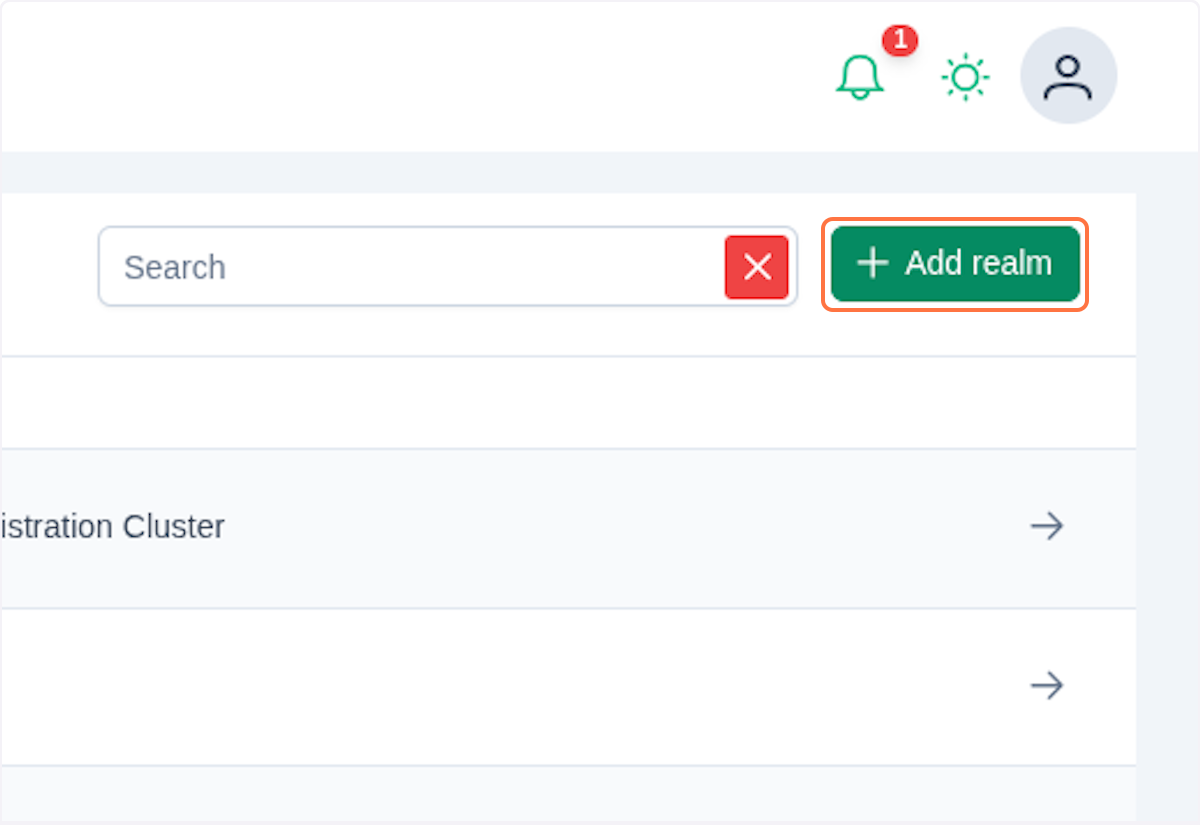
In Realms view click on Add realm.
You should see a dialog with the Realm form.
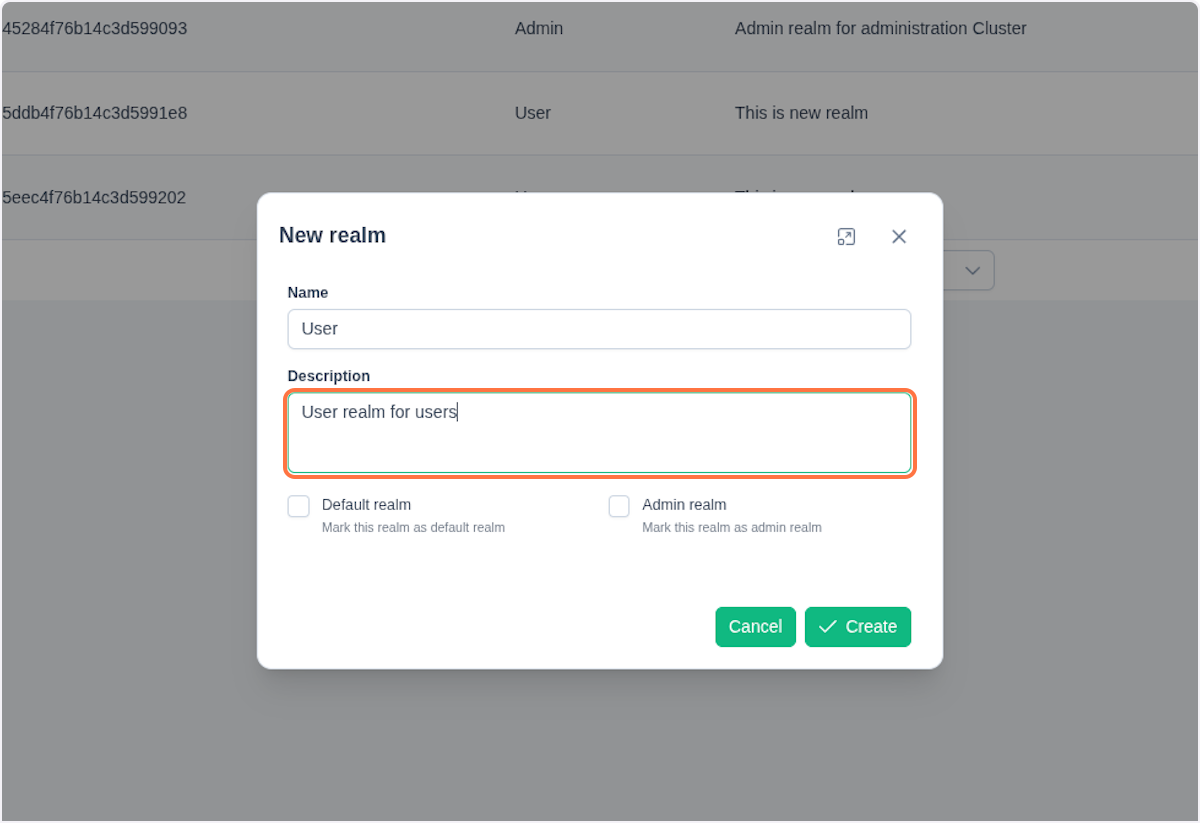
Fill out the form and click Create. The realm will be added to the table.
Create a New Auth Provider
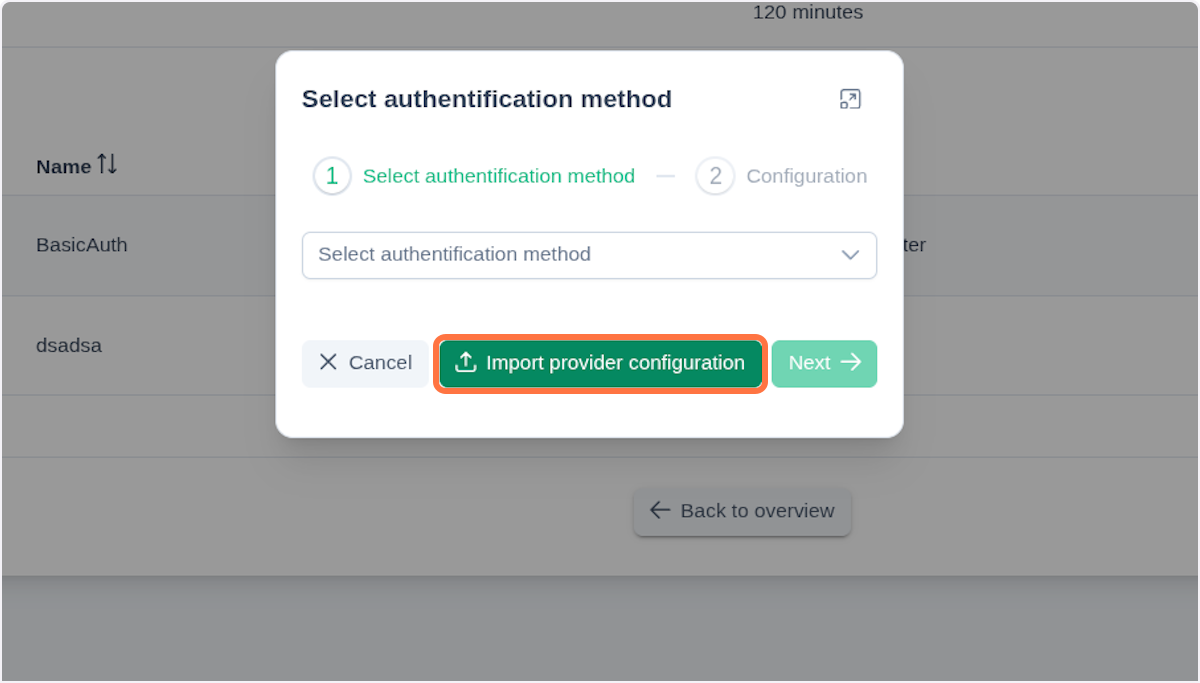
In the realm detail view, click Add authentication method. Either select the desired authentication provider from the dialog or import provider configuration by clicking Import provided configuration.
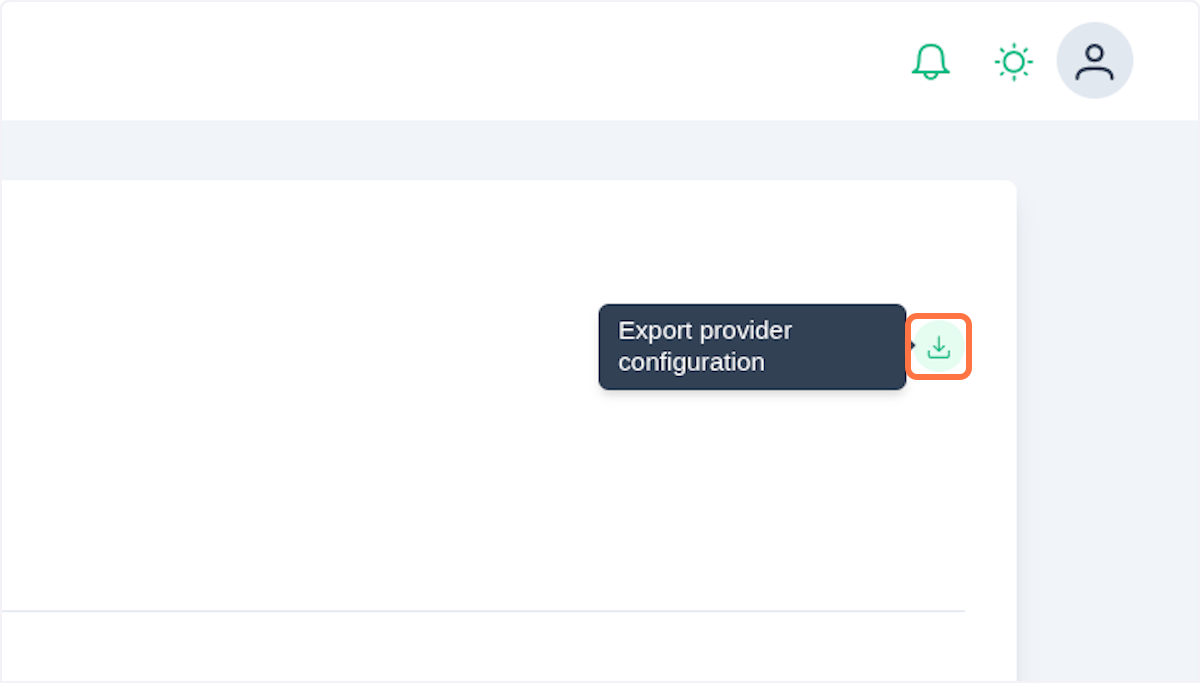
To export your configuration click on in an Auth provider detail.
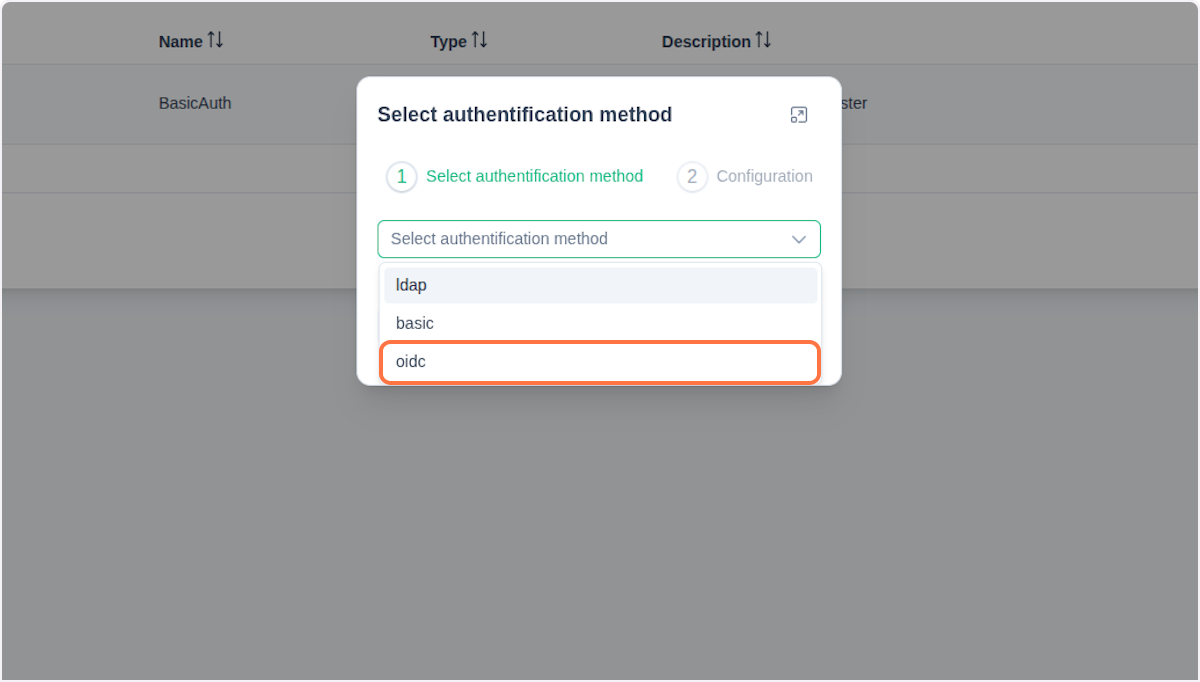
When selecting a provider, you currently have three options: Basic, LDAP and OIDC. Clicking Next takes you to the next step - filling out a form that differs based on the chosen provider.
The following section provides an explanation of LDAP and OIDC.
LDAP
Here's an example form for the LDAP provider:
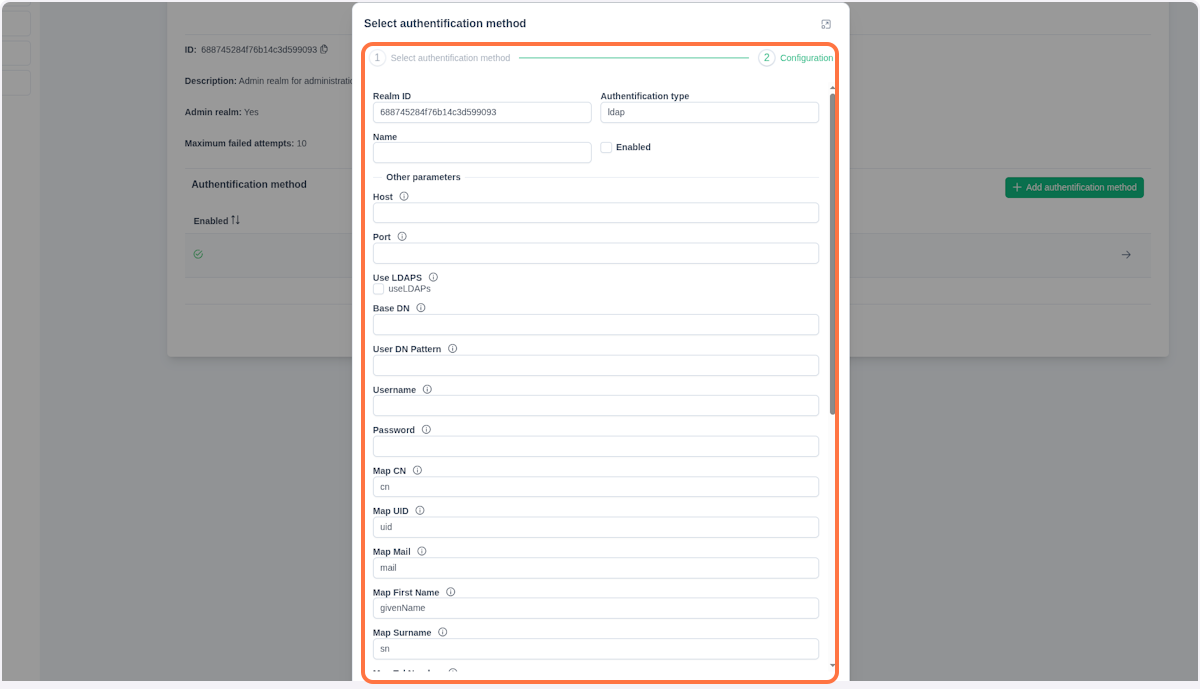
Fill out the Name for this provider and enable this authentication method with checkbox Enabled. When choosing LDAP, make sure to fill out all the provided fields:
- Host - Hostname or IP address of the LDAP server
- Port - Network port number for LDAP connection (typically 389 for LDAP, 636 for LDAPs)
- Use LDAPS - Enable secure LDAP over SSL/TLS connection
- Base DN - Base Distinguished Name, the starting point for directory searches
- User DN Pattern - Pattern used to construct user's Distinguished Name
- Username - Administrative username for binding to LDAP server
- Password - Password for administrative LDAP account
- Mappings:
- Map CN - Common Name attribute mapping
- Map UID - User ID attribute mapping
- Map Mail - Email address attribute mapping
- Map First Name - First name attribute mapping
- Map Surname - Last name attribute mapping
- Map Tel Number - Telephone number attribute mapping
- Map Display Name - Display name attribute mapping
- Map Home Directory - Home directory path attribute mapping
- Map Object Class - Object class attribute mapping
- Map Member Of - Group membership attribute mapping
- Map User Password - User password attribute mapping
- Map Group CN - Group Common Name attribute mapping
- Map Group Member - Group member attribute mapping
- Map Group Object Class - Group object class attribute mapping
- Map Group Description - Group description attribute mapping
After completing the configuration, click Confirm. To make changes later, open the Authentication Provider Information section and click the icon next to the provider (in a table entry).
For more information, refer to ldap specification.
OpenID Connect
To register a new OpenID Connect auth provider, select the oidc option in the first step mentioned before.
Fill all the necessary fields in the next step.
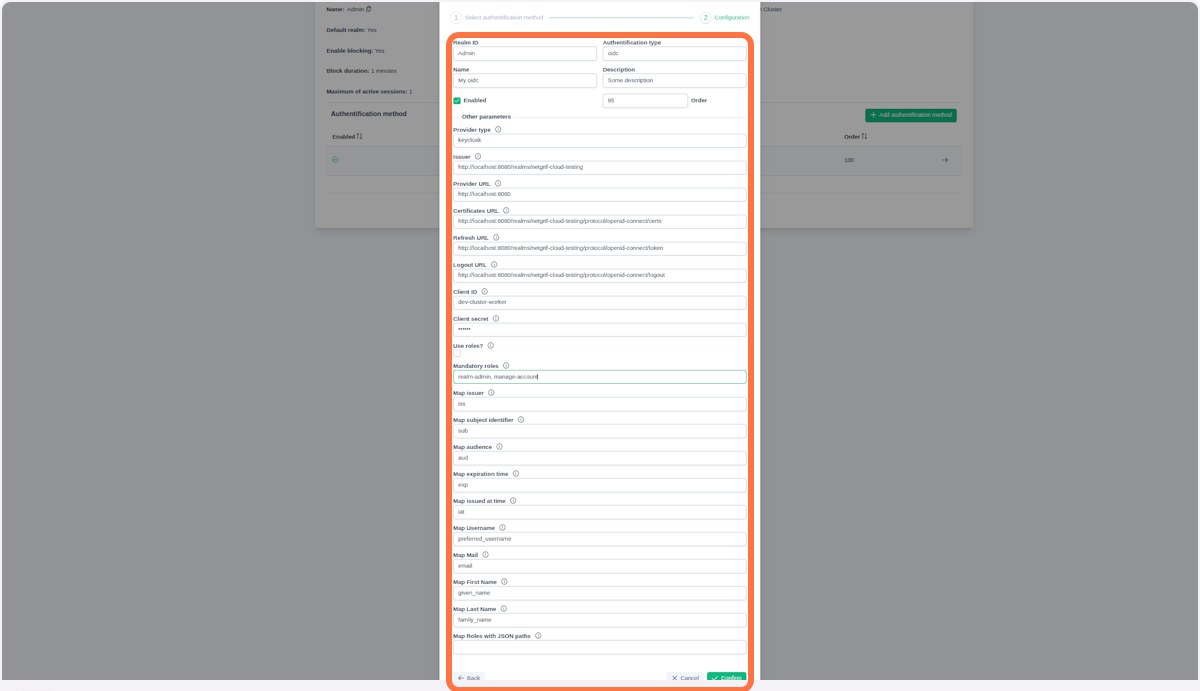
- Realm ID - Netgrif Platform realm in which we want to register a new provider
- Authentication type - Type of authentication provider (Basic, LDAP, OIDC)
- Name - Name of the authentication provider
- Description - Description of the authentication provider
- Enabled - Whether this authentication provider is enabled
- Order - Order in which providers are evaluated
- Provider type - Specific type of authentication provider (currently only
keycloak) - Issuer - URL of the OpenID Connect identity provider
- Provider URL - Base URL of the authentication provider
- Certificates URL - URL to obtain provider's certificates
- Refresh URL - URL for refreshing authentication tokens
- Logout URL - URL for logging out users
- Client ID - Client identifier for the application
- Client secret - Secret key for client authentication
- Enable Audience validation - Whether the client identifier is included in the audience claim
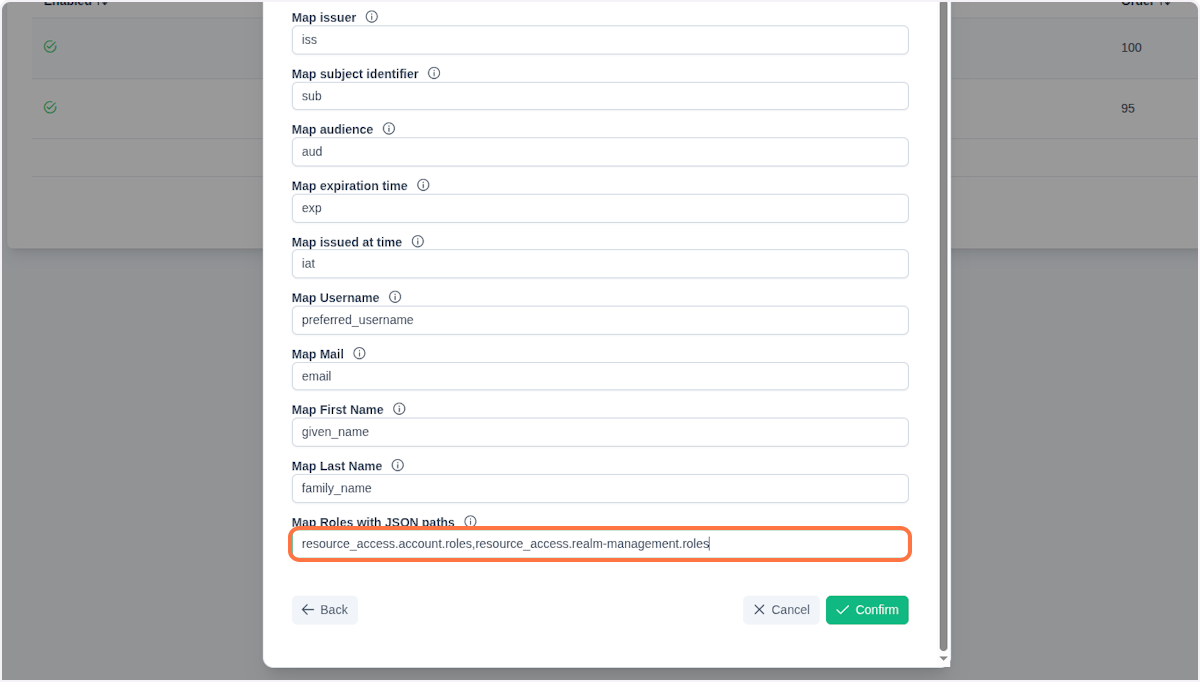
- Mappings:
- Map Issuer - JSON key to map issuer claim
- Map subject identifier - JSON key to map subject ID
- Map audience - JSON key to map audience claim
- Map expiration time - JSON key to map token expiration
- Map issued at time - JSON key to map token issue time
- Map Username - JSON key to map username
- Map email - JSON key to map email address
- Map Full name - JSON key to map full name
- Map First name - JSON key to map first name
- Map Last name - JSON key to map last name
- Map Roles with JSON paths - JSON path to map role information
- Use roles? - Whether to assign roles from provider to the user
- Mandatory roles - Required roles for authentication
- Ignore Global Role Prefix - Roles provided by OP (OpenID Provider) will be mapped without
globalprefix
NOTE
Enabling the Use roles? checkbox activates role mapping from the authentication provider. During user authorization, the RP (Relying Party) - in this case Admin node - parses the role names and attempts to map them to existing role identifiers. If a role identifier with the matching name exists, that role is automatically assigned to the user.
This approach allows the OP (OpenID Provides) to manage process roles without requiring additional configuration in the Admin web console.
If you are using Keycloak as the provider, you can find all necessary configuration options in the well-known.json file, located at:
/realms/{realm-name}/.well-known/openid-configurationFor more information refer to keycloak documentation.
It is necessary for your oidc provider to configure proper JWT object for access ID Token and Logout Token. All REQUIRED fields need to be provided for successfull authentication:
- ID Token
- iss (Issuer) - URI that identifies the token issuer
- sub (Subject) - Unique identifier for the user
- aud (Audience) - Client ID the token is intended for
- exp (Expiration Time) - Token expiration timestamp
- iat (Issued At) - Token issuance timestamp
- Required fields for successfull user initialization:
- username/preferred_username - Username or preferred username
- Strongly recommended fields:
- email - User's email address
- given_name - User's first name
- family_name - User's last name
Here's the OpenID documentation reference.
OpenID Providers send a JWT, similar to an ID Token, to RPs (Relying Parties) called a Logout Token, which requests that they log the user out.
The following claims are used within the Logout Token.
- Logout Token
- iss (Issuer) - URI that identifies the token issuer
- sub (Subject) - Unique identifier for the user
- aud (Audience) - Client ID the token is intended for
- exp (Expiration Time) - Token expiration timestamp
- iat (Issued At) - Token issuance timestamp
- jti (JWT ID) - Unique identifier for the token, included in the token’s claims
- events (JSON Object) - Declares that the JWT is a Logout Token; must contain member name
Here is an example Logout Token from OpenID documentation.
 {
  "iss": "https://server.example.com",
  "sub": "248289761001",
  "aud": "s6BhdRkqt3",
  "iat": 1471566154,
  "exp": 1471569754,
  "jti": "bWJq",
  "sid": "08a5019c-17e1-4977-8f42-65a12843ea02",
  "events": {
    "http://schemas.openid.net/event/backchannel-logout": {}
  }
}
A necessary step is to enable SSO on your frontend. To do so, add the following object to the providers.auth section in nae.json:
{
  "sso": {
    "enable": true,
    "clientId": "dev-cluster-worker",
    "redirectUrl": "http://example:8080/realms/{realm-id}/protocol/openid-connect/auth",
    "refreshUrl": "http://example:8801/api/auth/login",
    "scopes": [
      "openid",
      "email",
      "profile",
      "roles"
    ]
  }
}
Remember to set authentication to BasicWithRealm.
Important
If you enable role mapping using the Use roles checkbox during provider registration, you must define the JSON paths for these roles in Map Roles with JSON path.