Applications
This section explains how to create, deploy, and manage Applications within the Netgrif Platform. Applications help organize your workflows, making them easier to use, maintain, and evolve.
What is an Application?
An Application in the Netgrif Platform is a logical bundle of processes, cases, and other assets that work together to support a specific business function. It ensures that all interdependent components are deployed and executed as one unit.
Applications express the relationships and dependencies between multiple processes, ensuring they are deployed and executed as a unified unit. This results in more efficient servicing, as all related processes are treated as a single package.
When a process cannot function independently, it is a strong candidate to be part of an application.
✅ What Applications Are:
- Logical grouping of interdependent processes and case templates
- A deployable and manageable unit
- A way to structure complex business logic
- Scalable, modular, and unified
❌ What Applications Are Not:
- Standalone deployments of NAE (Netgrif Application Engine)
- Plugins or external tools without processes
- Docker images or physical containers
Applications streamline deployment and ensure consistency by treating interconnected elements as a single package.
Application Package Structure
Applications are packaged into a ZIP file with a defined structure and a manifest.xml file that contains metadata. This manifest includes metadata such as name, version, author, and file paths to the resources. You can read more about the manifest structure here.
Application zip Structure
/processes/- Process XML files directory/imports/- Cases XML files directory/dependencies/- dependencies directory (optional)
manifest.xml- Describes the app metadata, processes, and dependencies
Remember
- File names must match process identifiers
- Paths in the manifest must be exact
Manifest File
The manifest.xml file is the central configuration for an application package. It resides at the root of the ZIP archive and defines the metadata and structure of the application. This file represents a Case (a process instance).
Key Fields
name: The name of your applicationversion: Version of the application (e.g.,1.0.0)author: Creator or organizationprocess: List of process file pathsimport: List of import (case) file pathsdependencies: List of dependent applications that the application requires to function properly
Application Lifecycle
Applications follow a standard lifecycle after upload:
| Status | Description |
|---|---|
new | Uploaded, pending deployment |
deploying | Deployment in progress |
active | Deployed successfully |
failed | Deployment error, rolled back |
inactive | Manually removed or decommissioned |
During each stage, the Admin UI and API provide feedback and logging.
Working with Applications
This section serves as a guide on how to create, deploy and manage applications in the Netgrif Platform.
Application creation
To create an application in the Netgrif Platform, we recommend using the Netgrif Builder, where you can create all parts of the application package and export it in ZIP format. You can learn how to use the Application Builder here.
You can also create processes and manifest files by yourself. However, it is essential to respect the structure of the application.
Directory structure example:
your-app.zip
    ├── manifest.xml
    ├── processes/
    │   ├── my-process-1.xml
    |   └── my-process-2.xml
    ├── imports/
    │   ├── my-case-1.xml
    |   └── my-case-2.xml
    │   └── case-to-import.xml
Application deployment
To deploy the application, you need to sign in the account on Netgrif application admin.
Upload the Application Package
IMPORTANT
Before you upload your application, check for processes with these identifiers:
filterimport_filtersexport_filtersmenu_itemtabbed_case_view_configurationtabbed_task_view_configurationtabbed_ticket_view_configurationtabbed_single_task_view_configurationimpersonation_configimpersonation_users_select
These processes are deployed to cluster by default. Always deploy these processes to the Root Node! Otherwise, your frontend application may not function properly.
In the Admin Panel, click on Apps in the left menu panel. If you don't see the side menu, click on Apps in the top navigation menu.
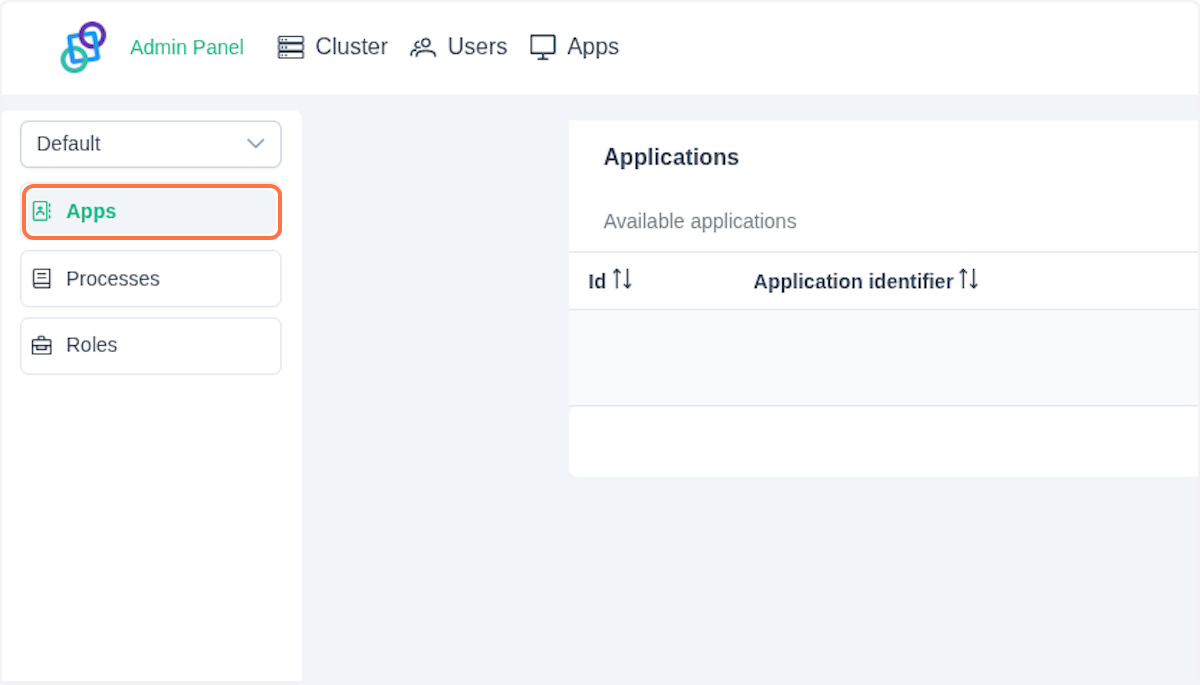
Navigate to the button New Application.
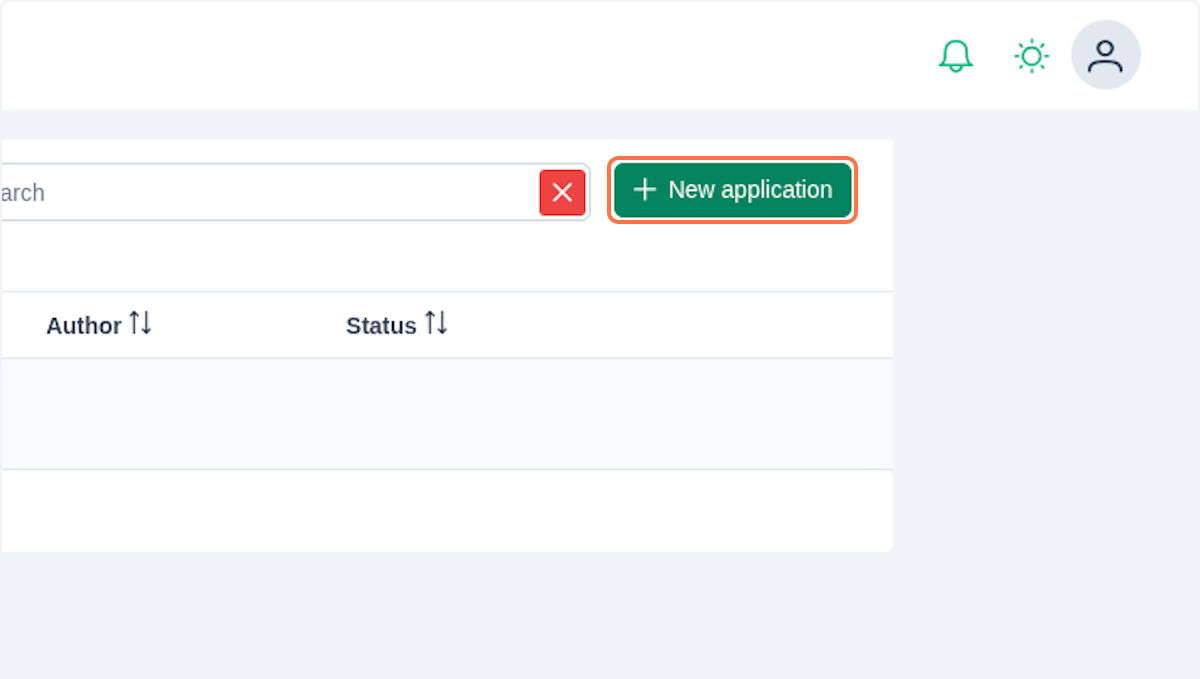
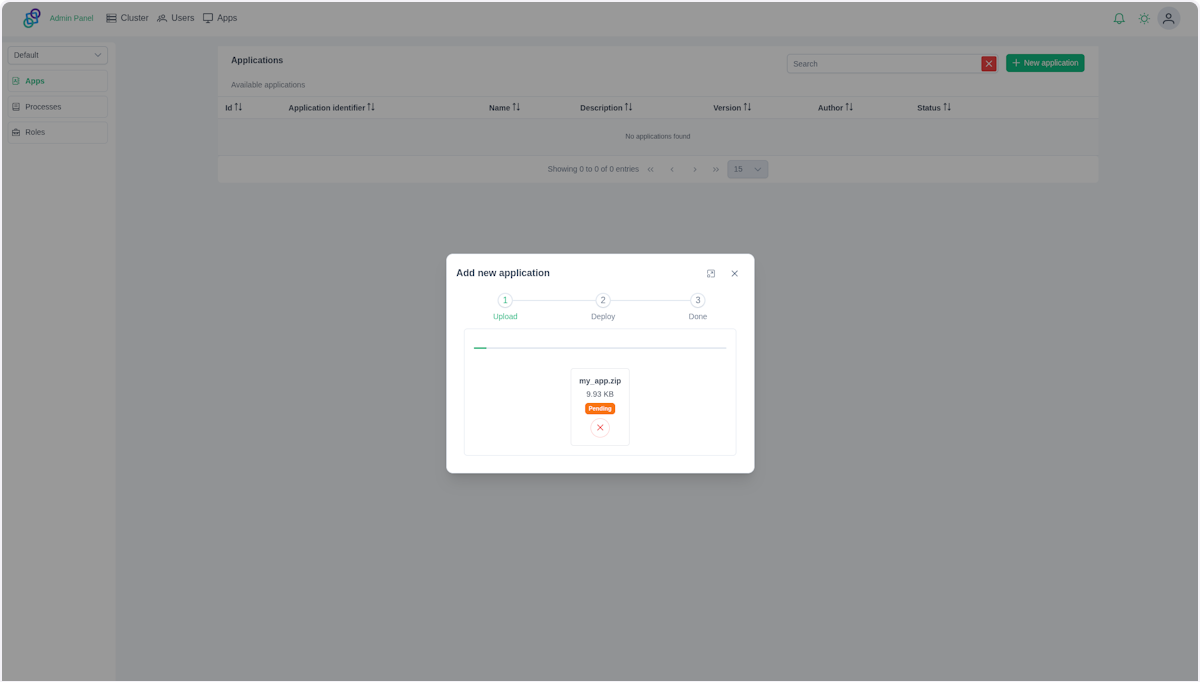
In the displayed dialog upload the ZIP file containing your application package.
NOTE
After the upload, the system will:
- Read and save the metadata (name, version, author, process list, etc.)
- Set the application status to
New(awaiting deployment)
System will show you a list of processes and cases that were uploaded:
- A list of Processes (e.g.,
my-process-1.xml) - A list of Case Imports (e.g.,
my-case-1.xml)
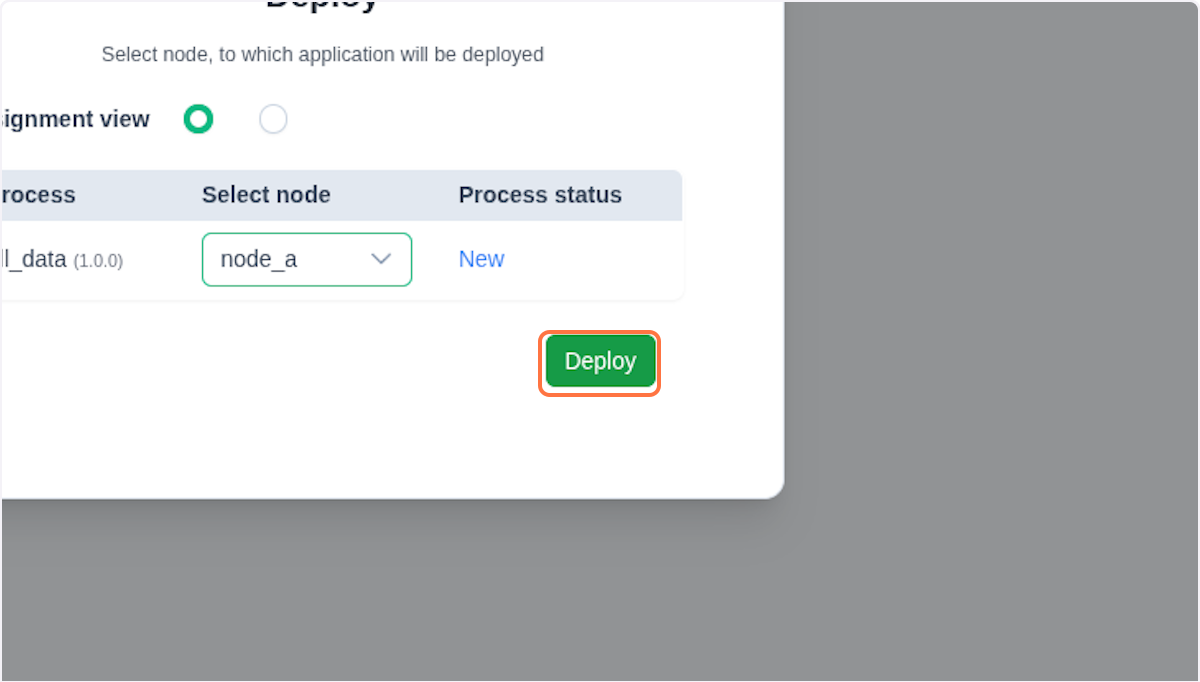
For each item use the dropdown or input field to assign a node/worker (e.g., node_root, node_a).
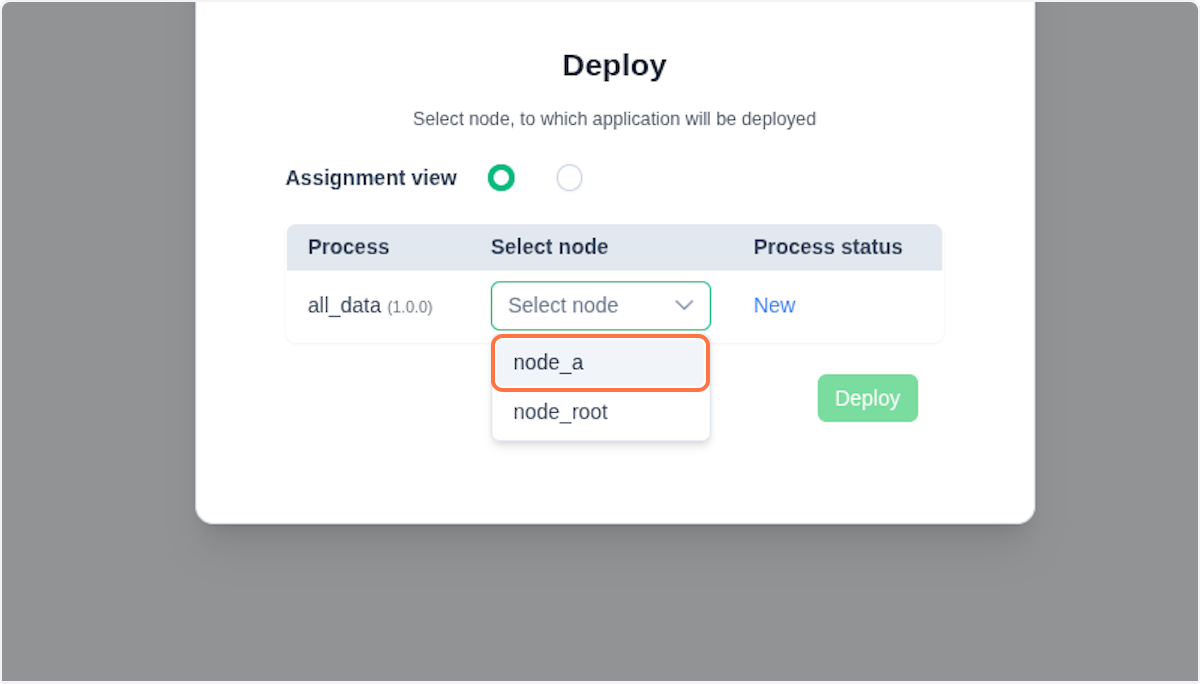
Once all items are assigned, click the Deploy button.
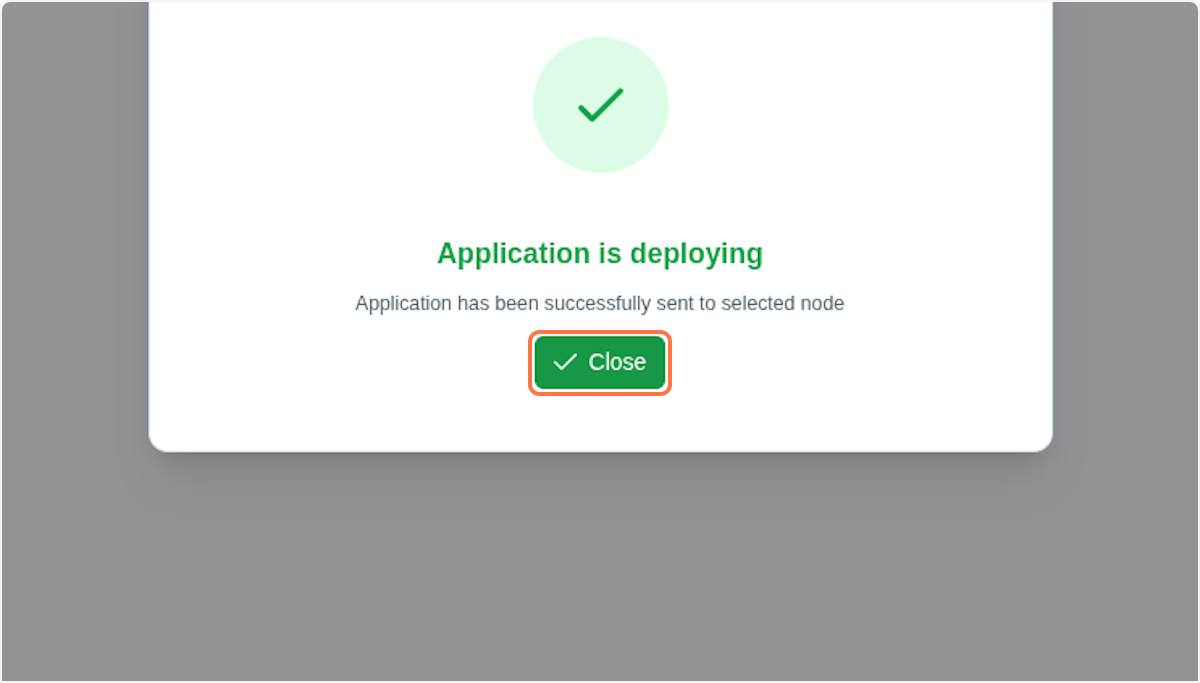
After a confirmation text saying that your items are deploying, click on Close.
✅ On success:
- Resources are deployed to specified nodes
- Status updates to
ACTIVE
❌ On failure:
- The system rolls back the deployment
- Status updates to
FAILED
At this point, you should see your deployed application in the table.
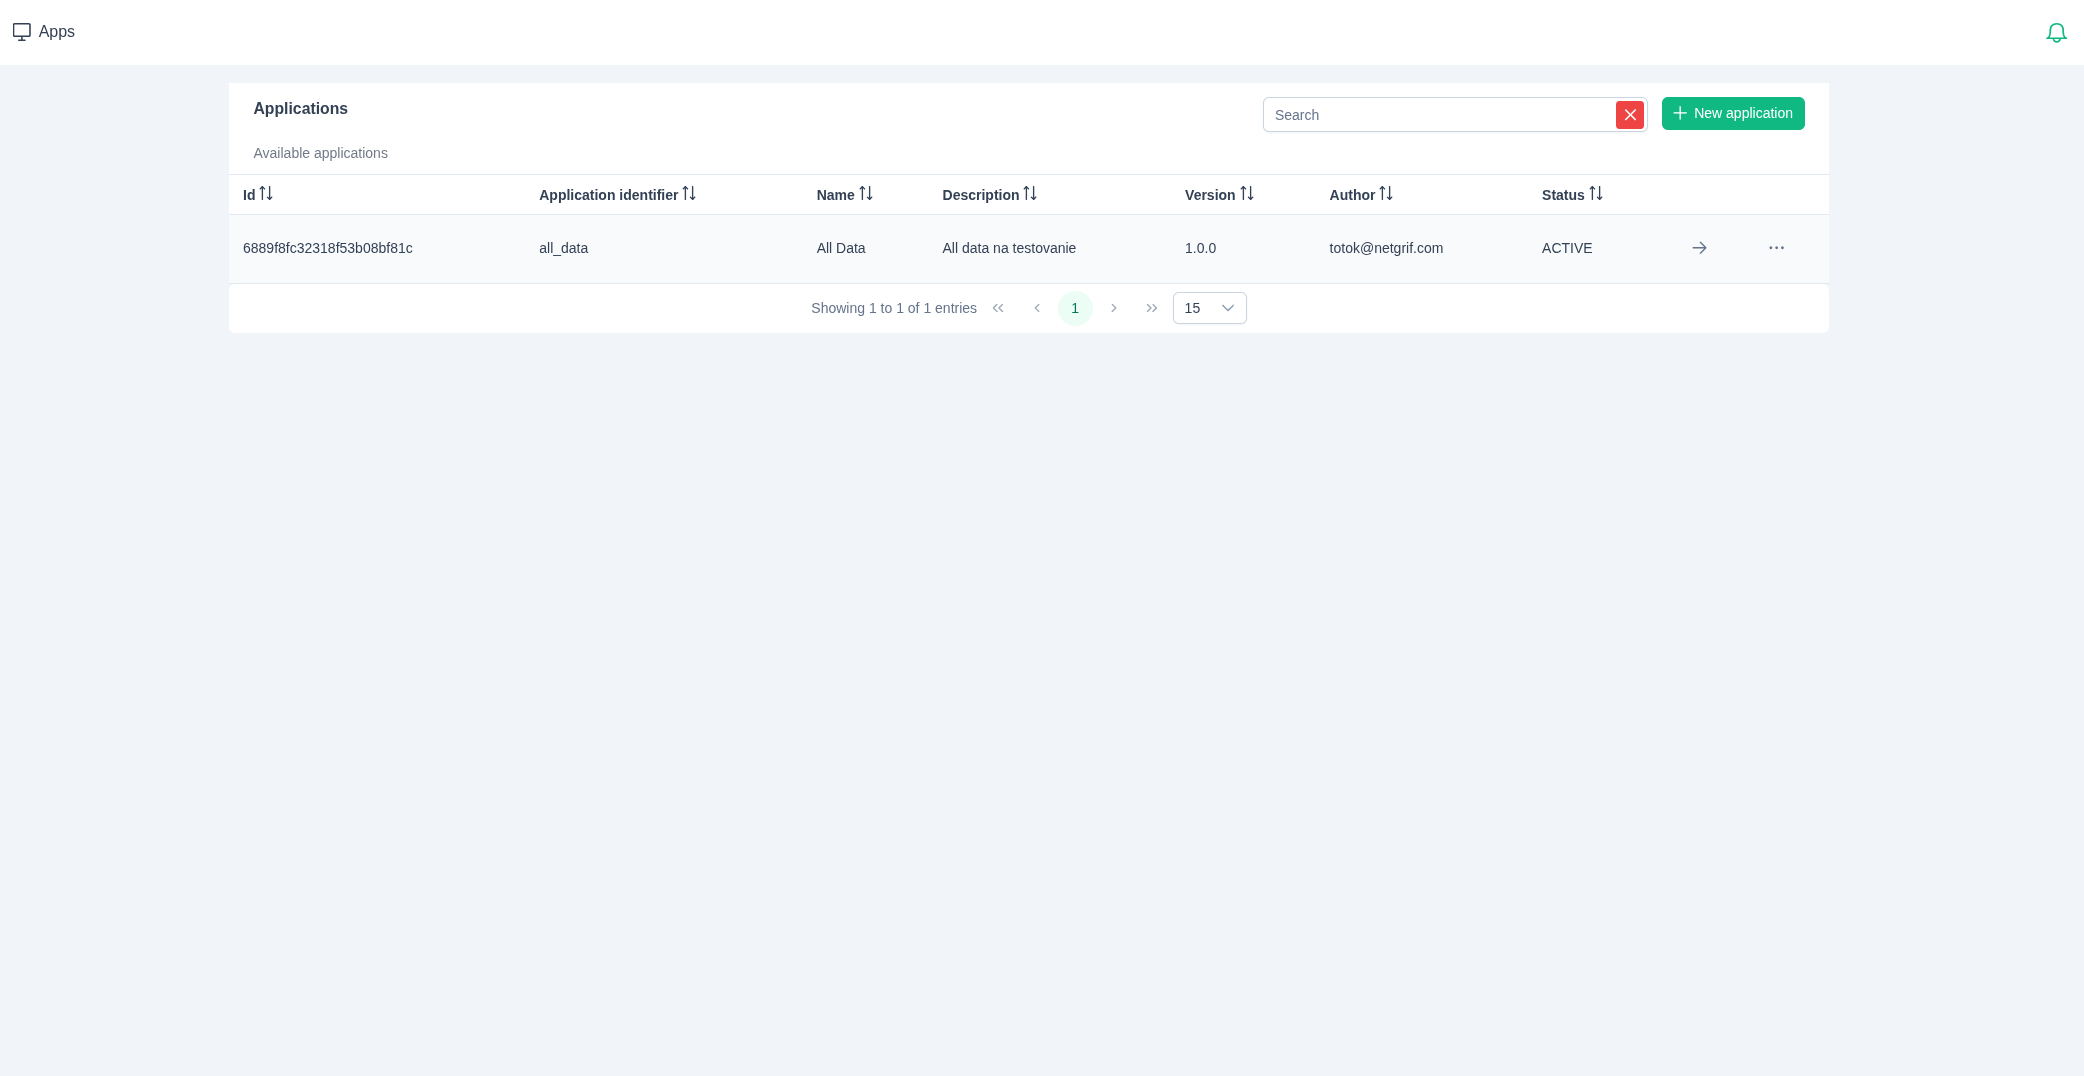
Each table item contains:
- Id - Unique identifier of the application
- Application identifier - Human-readable application identifier
- Name - Display name of the application
- Description - Brief explanation of the application's purpose
- Version - Current version number
- Author - Creator or responsible organization
- Status - Current deployment state (
NEW,DEPLOYING,ACTIVE,FAILED,DELETING, orINACTIVE)
💡 Tip
Use the search bar and filters to find specific applications by name or status.
By clicking on in the table entry, you can view detail of your application.

In the detail view, you can check that yuo application is deployed.

Managing Applications
Once applications are deployed, you can manage them using several available tools and actions. This section outlines what a user can do with existing applications in the system.
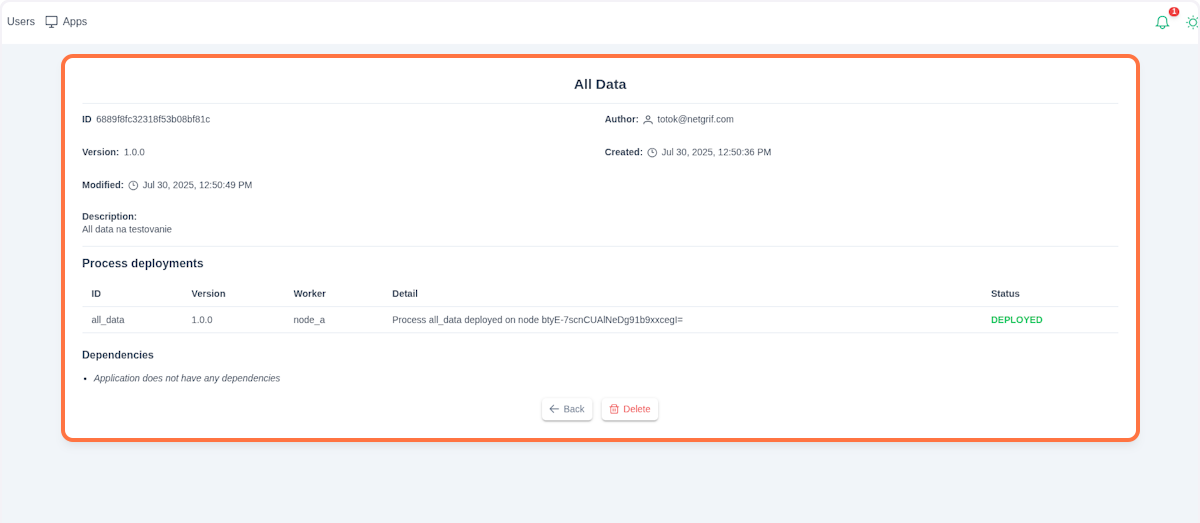
View Details
- Click on any application in the list to view detailed information.
- You’ll be able to see:
- Manifest metadata (name, version, author, etc.)
- Lists of all processes and cases
- Deployment status and logs
- Node assignment (where each process/case is deployed)
In the Dependencies section, you can see a list of all applications that this application depends on. You need to have these applications deployed for proper functionality. Be sure to deploy the applications in the order that your business logic requires.
IMPORTANT
Applications are zone agnostic, so one application can exist across multiple zones. This means that processes and cases from a single application can be distributed and deployed to different zones while still functioning as one cohesive unit.
Delete an Application
If you wish to remove a deployed application, click the Delete button in the details view. This action will delete all processes deployed by this application across all nodes. Cases will not be deleted!
In case of deletion failure (application status is FAILURE), there is an emergency Force Delete button, that will forcingly remove processes and application.
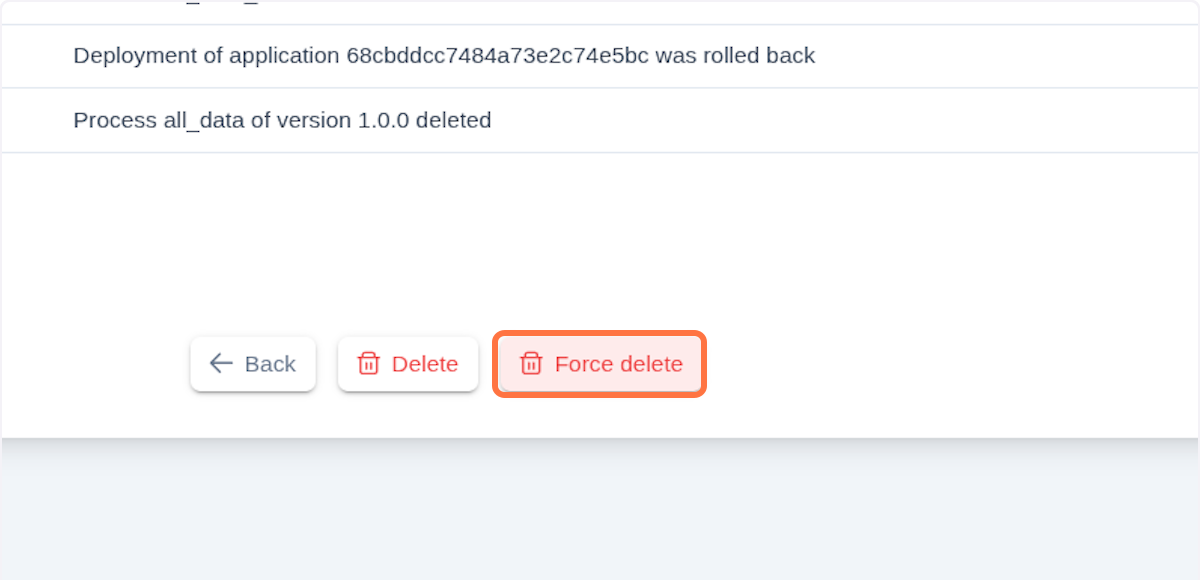
IMPORTANT
Use Force Delete or Delete buttons only if you are sure that this deletion does not affect other applications or processes.
Troubleshooting
Why is my application not deploying?
Common issues
- Missing or invalid
manifest.xml - Incorrect folder or file names
- Node mapping errors during deployment
Solutions
- Validate the manifest schema
- Ensure all referenced files exist
- Match identifiers exactly
Best Practices
- Use meaningful, consistent names
- Group only interdependent processes
- Version all applications
- Test on staging nodes before production
- Include helpful assets like filters and roles