Petriflow 101 - Part 4
Workflow - Object-Centric Process
💡 What you'll build
Extend the Request Form into a real process-based application using workflow elements - places and transitions - in the Petriflow language.
Overview
Goal & Context
This part turns your single Request form into a true workflow: multiple states (places), tasks (transitions), and user interactions that move tokens through the process. You’ll design the flow in Builder, then validate the runtime behavior in eTask.
You will:
- Reuse the Part 1 model as a base
- Add places (states) and transitions (tasks) with arcs
- Share/attach forms to transitions for client and employee steps
- Deploy and test the end-to-end workflow
Step-by-Step Flow
| Step | Action | Purpose |
|---|---|---|
| 1️⃣ | Load Request model in Builder | Start from the working form |
| 2️⃣ | Add places (e.g., Submitted, Registered, Waiting for legal, Answered) | Define process states |
| 3️⃣ | Add transitions (Register, go_to_legal / skip_legal, Statement of legal, Answer, Status) | Define tasks/events |
| 4️⃣ | Connect arcs between places ↔ transitions | Set token flow and control logic |
| 5️⃣ | Attach forms to transitions | Reuse or share forms for each step |
| 6️⃣ | Simulate in Builder | Check enabled tasks & token movement |
| 7️⃣ | Deploy to eTask | Run and verify the live workflow |
Concept: From Form to Process
- Places ( ) represent states the case can be in
- Transitions ( ) represent tasks users (or system) perform
- Arcs define how tokens move between states and tasks
- Shared forms let multiple tasks reuse the same UI and data
NOTE
Keep transitions small and focused (one user intention per task). This simplifies permissions, testing, and future changes.
Video
Watch the “First Workflow in Builder” segment (24:16–43:50).
Pictures of steps
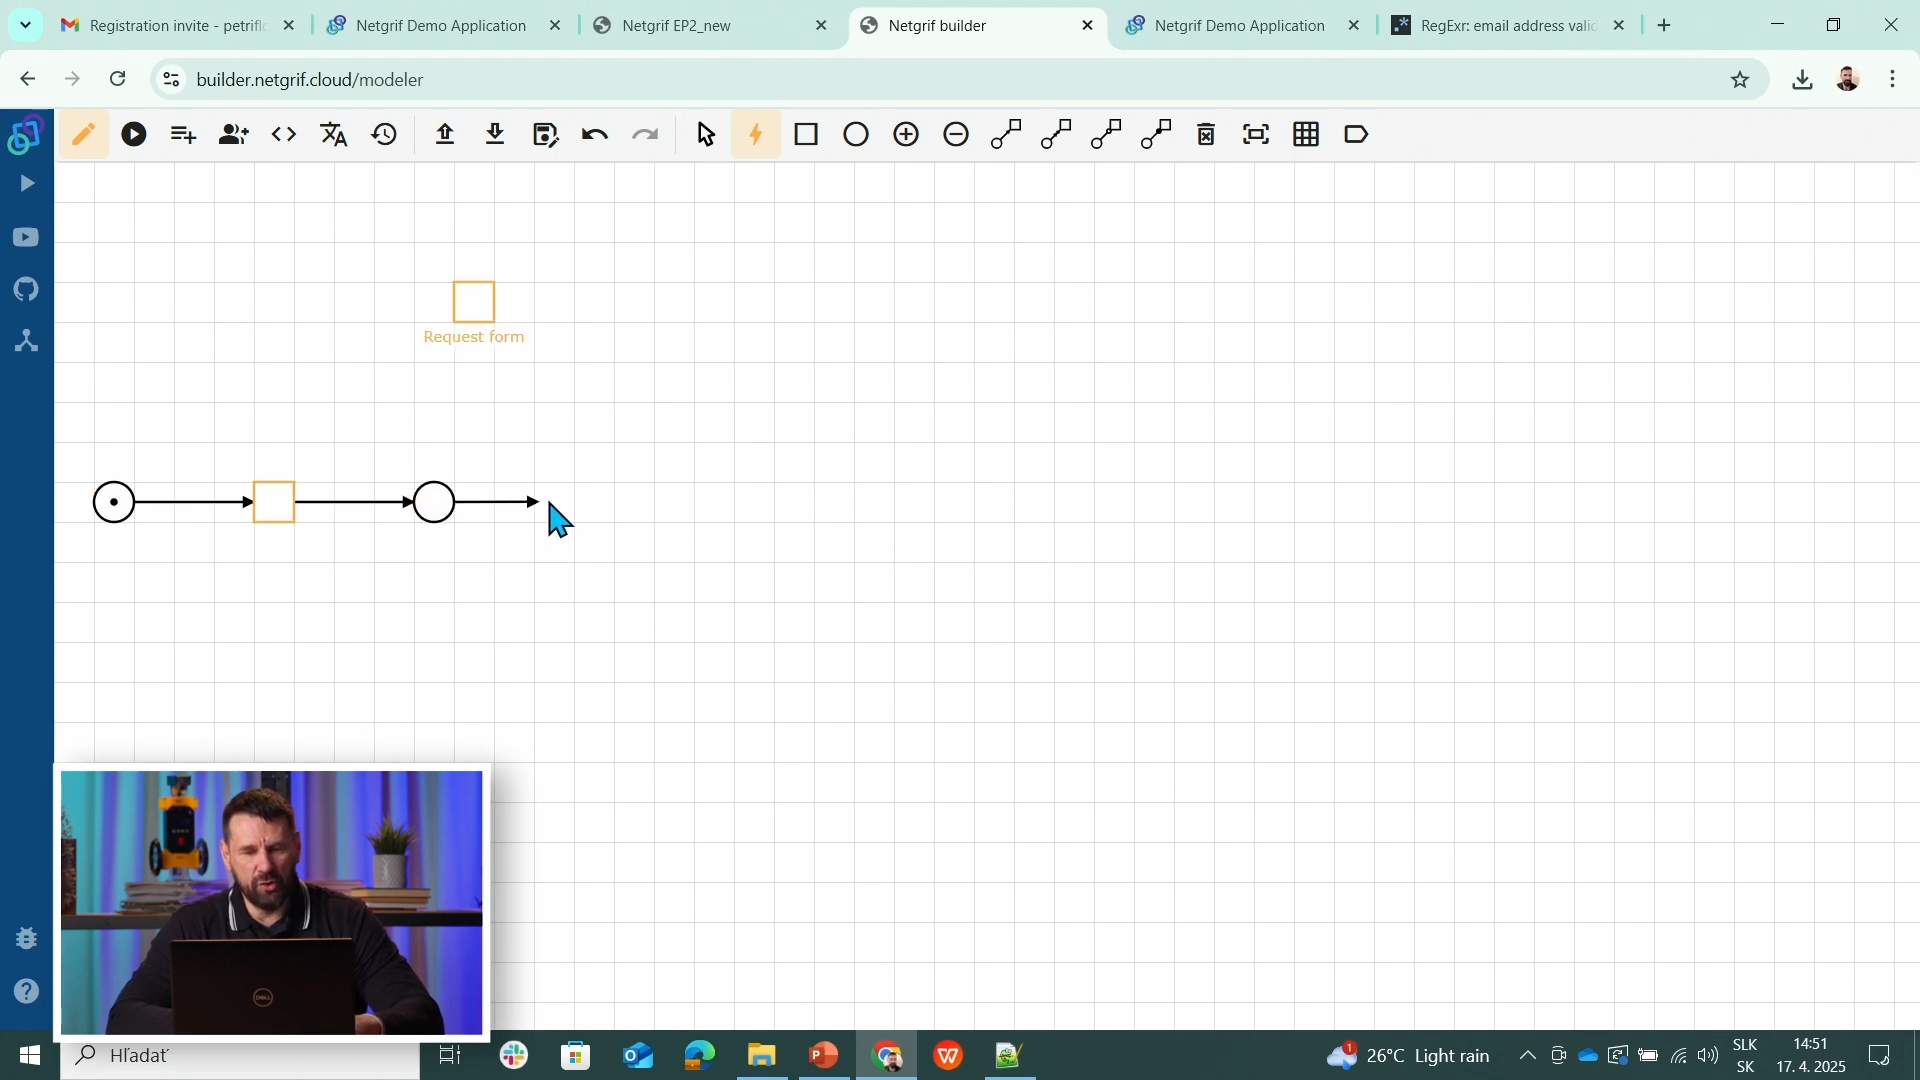
1️⃣ Places & Tasks - Connected via Arcs
In Petriflow, a process is modeled as a .
Places represent states of the process (e.g., New Request, Registered, Answered). Transitions (Tasks) represent actions or events that change the state (e.g., Register Request, Prepare Answer, Send Reply). Arcs connect places and transitions - defining how tokens (data/state) flow between them. Arcs can have different types or values, but the default connection passes control flow and data tokens.
2️⃣ Workflow Edit View
The Edit View in Netgrif Builder lets you visually design your process structure. You can create places and transitions, connect them with arcs, and configure their properties - all without writing a code. Each element (place, transition, or arc) can be clicked to open its detailed configuration, such as data mappings, roles, or transition logic. This view is where the Petri net is graphically created and maintained.

3️⃣ Workflow Simulation View
The Simulation View allows you to run and test your process directly in the Builder. It simulates how tokens move through the Petri net - showing which transitions are available, how data changes as tasks are completed, and how roles interact with the workflow. This helps you verify that your process logic works correctly before deploying it to eTask.

Source & Notes
You can find the process on the Builder source (Part 4)
Source code (XML file)
<document xmlns:xsi="http://www.w3.org/2001/XMLSchema-instance" xsi:noNamespaceSchemaLocation="https://petriflow.com/petriflow.schema.xsd">
  <id>request</id>
  <version>1.0.0</version>
  <initials>RQT</initials>
  <title>Request</title>
  <icon>device_hub</icon>
  <defaultRole>true</defaultRole>
  <anonymousRole>true</anonymousRole>
  <transitionRole>false</transitionRole>
  <data type="file">
    <id>attachment</id>
    <title>Attachment</title>
  </data>
  <data type="text">
    <id>email</id>
    <title>Email</title>
    <validations>
      <validation>
        <expression>regex ^[\w-\.]+@([\w-]+\.)+[\w-]{2,4}$</expression>
        <message>Please type a valid email</message>
      </validation>
    </validations>
  </data>
  <data type="text">
    <id>name</id>
    <title>Name</title>
  </data>
  <data type="text">
    <id>phone</id>
    <title>Phone number</title>
  </data>
  <data type="text">
    <id>request_text</id>
    <title>Request</title>
  </data>
  <data type="text">
    <id>surname</id>
    <title>Surname</title>
  </data>
  <transition>
    <id>t1</id>
    <x>336</x>
    <y>112</y>
    <label>Request form</label>
    <assignPolicy>auto</assignPolicy>
  </transition>
  <transition>
    <id>t2</id>
    <x>176</x>
    <y>272</y>
    <label>Submit request</label>
    <assignPolicy>auto</assignPolicy>
  </transition>
  <transition>
    <id>t3</id>
    <x>432</x>
    <y>272</y>
    <label>Register</label>
  </transition>
  <transition>
    <id>t4</id>
    <x>656</x>
    <y>176</y>
    <label>go_to_legal</label>
  </transition>
  <transition>
    <id>t5</id>
    <x>912</x>
    <y>176</y>
    <label>Statement of legal</label>
  </transition>
  <transition>
    <id>t6</id>
    <x>1136</x>
    <y>272</y>
    <label>Answer</label>
  </transition>
  <transition>
    <id>t7</id>
    <x>784</x>
    <y>272</y>
    <label>skip_legal</label>
  </transition>
  <transition>
    <id>t8</id>
    <x>432</x>
    <y>400</y>
    <label>Status</label>
  </transition>
  <place>
    <id>p1</id>
    <x>48</x>
    <y>272</y>
    <label>Start</label>
    <tokens>1</tokens>
    <static>false</static>
  </place>
  <place>
    <id>p2</id>
    <x>304</x>
    <y>272</y>
    <label>Submitted</label>
    <tokens>0</tokens>
    <static>false</static>
  </place>
  <place>
    <id>p3</id>
    <x>560</x>
    <y>272</y>
    <label>Registered</label>
    <tokens>0</tokens>
    <static>false</static>
  </place>
  <place>
    <id>p4</id>
    <x>784</x>
    <y>176</y>
    <label>Waiting for legal</label>
    <tokens>0</tokens>
    <static>false</static>
  </place>
  <place>
    <id>p5</id>
    <x>1008</x>
    <y>272</y>
    <label>Waiting for answer</label>
    <tokens>0</tokens>
    <static>false</static>
  </place>
  <place>
    <id>p6</id>
    <x>1264</x>
    <y>272</y>
    <tokens>0</tokens>
    <static>false</static>
  </place>
  <place>
    <id>p7</id>
    <x>304</x>
    <y>400</y>
    <label>Submitted</label>
    <tokens>0</tokens>
    <static>false</static>
  </place>
  <arc>
    <id>a1</id>
    <type>regular</type>
    <sourceId>p1</sourceId>
    <destinationId>t2</destinationId>
    <multiplicity>1</multiplicity>
  </arc>
  <arc>
    <id>a10</id>
    <type>regular</type>
    <sourceId>t6</sourceId>
    <destinationId>p6</destinationId>
    <multiplicity>1</multiplicity>
  </arc>
  <arc>
    <id>a11</id>
    <type>regular</type>
    <sourceId>p3</sourceId>
    <destinationId>t7</destinationId>
    <multiplicity>1</multiplicity>
  </arc>
  <arc>
    <id>a12</id>
    <type>regular</type>
    <sourceId>t7</sourceId>
    <destinationId>p5</destinationId>
    <multiplicity>1</multiplicity>
  </arc>
  <arc>
    <id>a13</id>
    <type>regular</type>
    <sourceId>t2</sourceId>
    <destinationId>p7</destinationId>
    <multiplicity>1</multiplicity>
  </arc>
  <arc>
    <id>a14</id>
    <type>read</type>
    <sourceId>p7</sourceId>
    <destinationId>t8</destinationId>
    <multiplicity>1</multiplicity>
  </arc>
  <arc>
    <id>a2</id>
    <type>regular</type>
    <sourceId>t2</sourceId>
    <destinationId>p2</destinationId>
    <multiplicity>1</multiplicity>
  </arc>
  <arc>
    <id>a3</id>
    <type>regular</type>
    <sourceId>p2</sourceId>
    <destinationId>t3</destinationId>
    <multiplicity>1</multiplicity>
  </arc>
  <arc>
    <id>a4</id>
    <type>regular</type>
    <sourceId>t3</sourceId>
    <destinationId>p3</destinationId>
    <multiplicity>1</multiplicity>
  </arc>
  <arc>
    <id>a5</id>
    <type>regular</type>
    <sourceId>p3</sourceId>
    <destinationId>t4</destinationId>
    <multiplicity>1</multiplicity>
  </arc>
  <arc>
    <id>a6</id>
    <type>regular</type>
    <sourceId>t4</sourceId>
    <destinationId>p4</destinationId>
    <multiplicity>1</multiplicity>
  </arc>
  <arc>
    <id>a7</id>
    <type>regular</type>
    <sourceId>p4</sourceId>
    <destinationId>t5</destinationId>
    <multiplicity>1</multiplicity>
  </arc>
  <arc>
    <id>a8</id>
    <type>regular</type>
    <sourceId>t5</sourceId>
    <destinationId>p5</destinationId>
    <multiplicity>1</multiplicity>
  </arc>
  <arc>
    <id>a9</id>
    <type>regular</type>
    <sourceId>p5</sourceId>
    <destinationId>t6</destinationId>
    <multiplicity>1</multiplicity>
  </arc>
</document>
NOTE
PetriNet elements make processes visual, logical, and testable - ideal for low-code automation in Netgrif Builder.
Summary
You’ve created your first workflow process - evolving the Request Form into a multi-step application with real process logic and user roles.
This sets the foundation for object-centric applications built with Petriflow and deployed through eTask.