Petriflow 101 - Part 1
Creating the First Form (Hybrid Layout)
💡 What you'll build
A public Request form in Netgrif Application Builder, using a 4-column grid layout and role-based access. This is your first real PetriFlow process - simple, visual, and deployable.
Overview
Goal & Content
In this tutorial, you’ll design a Request process - a basic form that users can fill out and submit. The focus is on:
- Creating and structuring form data fields
- Designing a responsive layout (4 columns)
- Making the form publicly accessible through defaultRole and anonymousRole
- Adding validation and visual clarity in Builder
You’ll work entirely inside Netgrif Application Builder.
Fields & Layout Overview
| Field ID | Label | Type | Required | Layout (Grid) | Component |
|---|---|---|---|---|---|
name | Name | Text | No | Row 1 Col 1–2 | - |
surname | Surname | Text | No | Row 1 Col 3–4 | - |
email | Text | Yes | Row 2 Col 1–2 | - | |
phone | Phone | Text | No | Row 2 Col 3–4 | - |
request_text | Request | Textarea | Yes | Row 3 Full (4 cols × 2 rows) | textarea |
attachment | Attachment | File | No | Row 5 Full (4 cols) | preview |
Grid layout:
4 columns, 5 rows - clean visual grouping of personal info, contact, message, and attachments.
Key Process Settings
- Process ID:
request - Initials:
RQT - Icon:
device_hub - Access:
defaultRole=true→ allows all logged-in usersanonymousRole=true→ allows public (not logged-in) users
- Task behavior:
assignPolicy="auto"→ automatically opens the form when the process starts
- Validation:
- Email field uses regex pattern to ensure correct syntax
- Request text is mandatory
NOTE
Keep Email and Request fields required to ensure that every submission is valid.
Video
Watch the “Form Creation” segment (00:00 – 12:40).
Visual Steps
1️⃣ Workflow & Metadata
Builder’s Edit Model / Edit View with process metadata: ID, roles, version, and appearance.
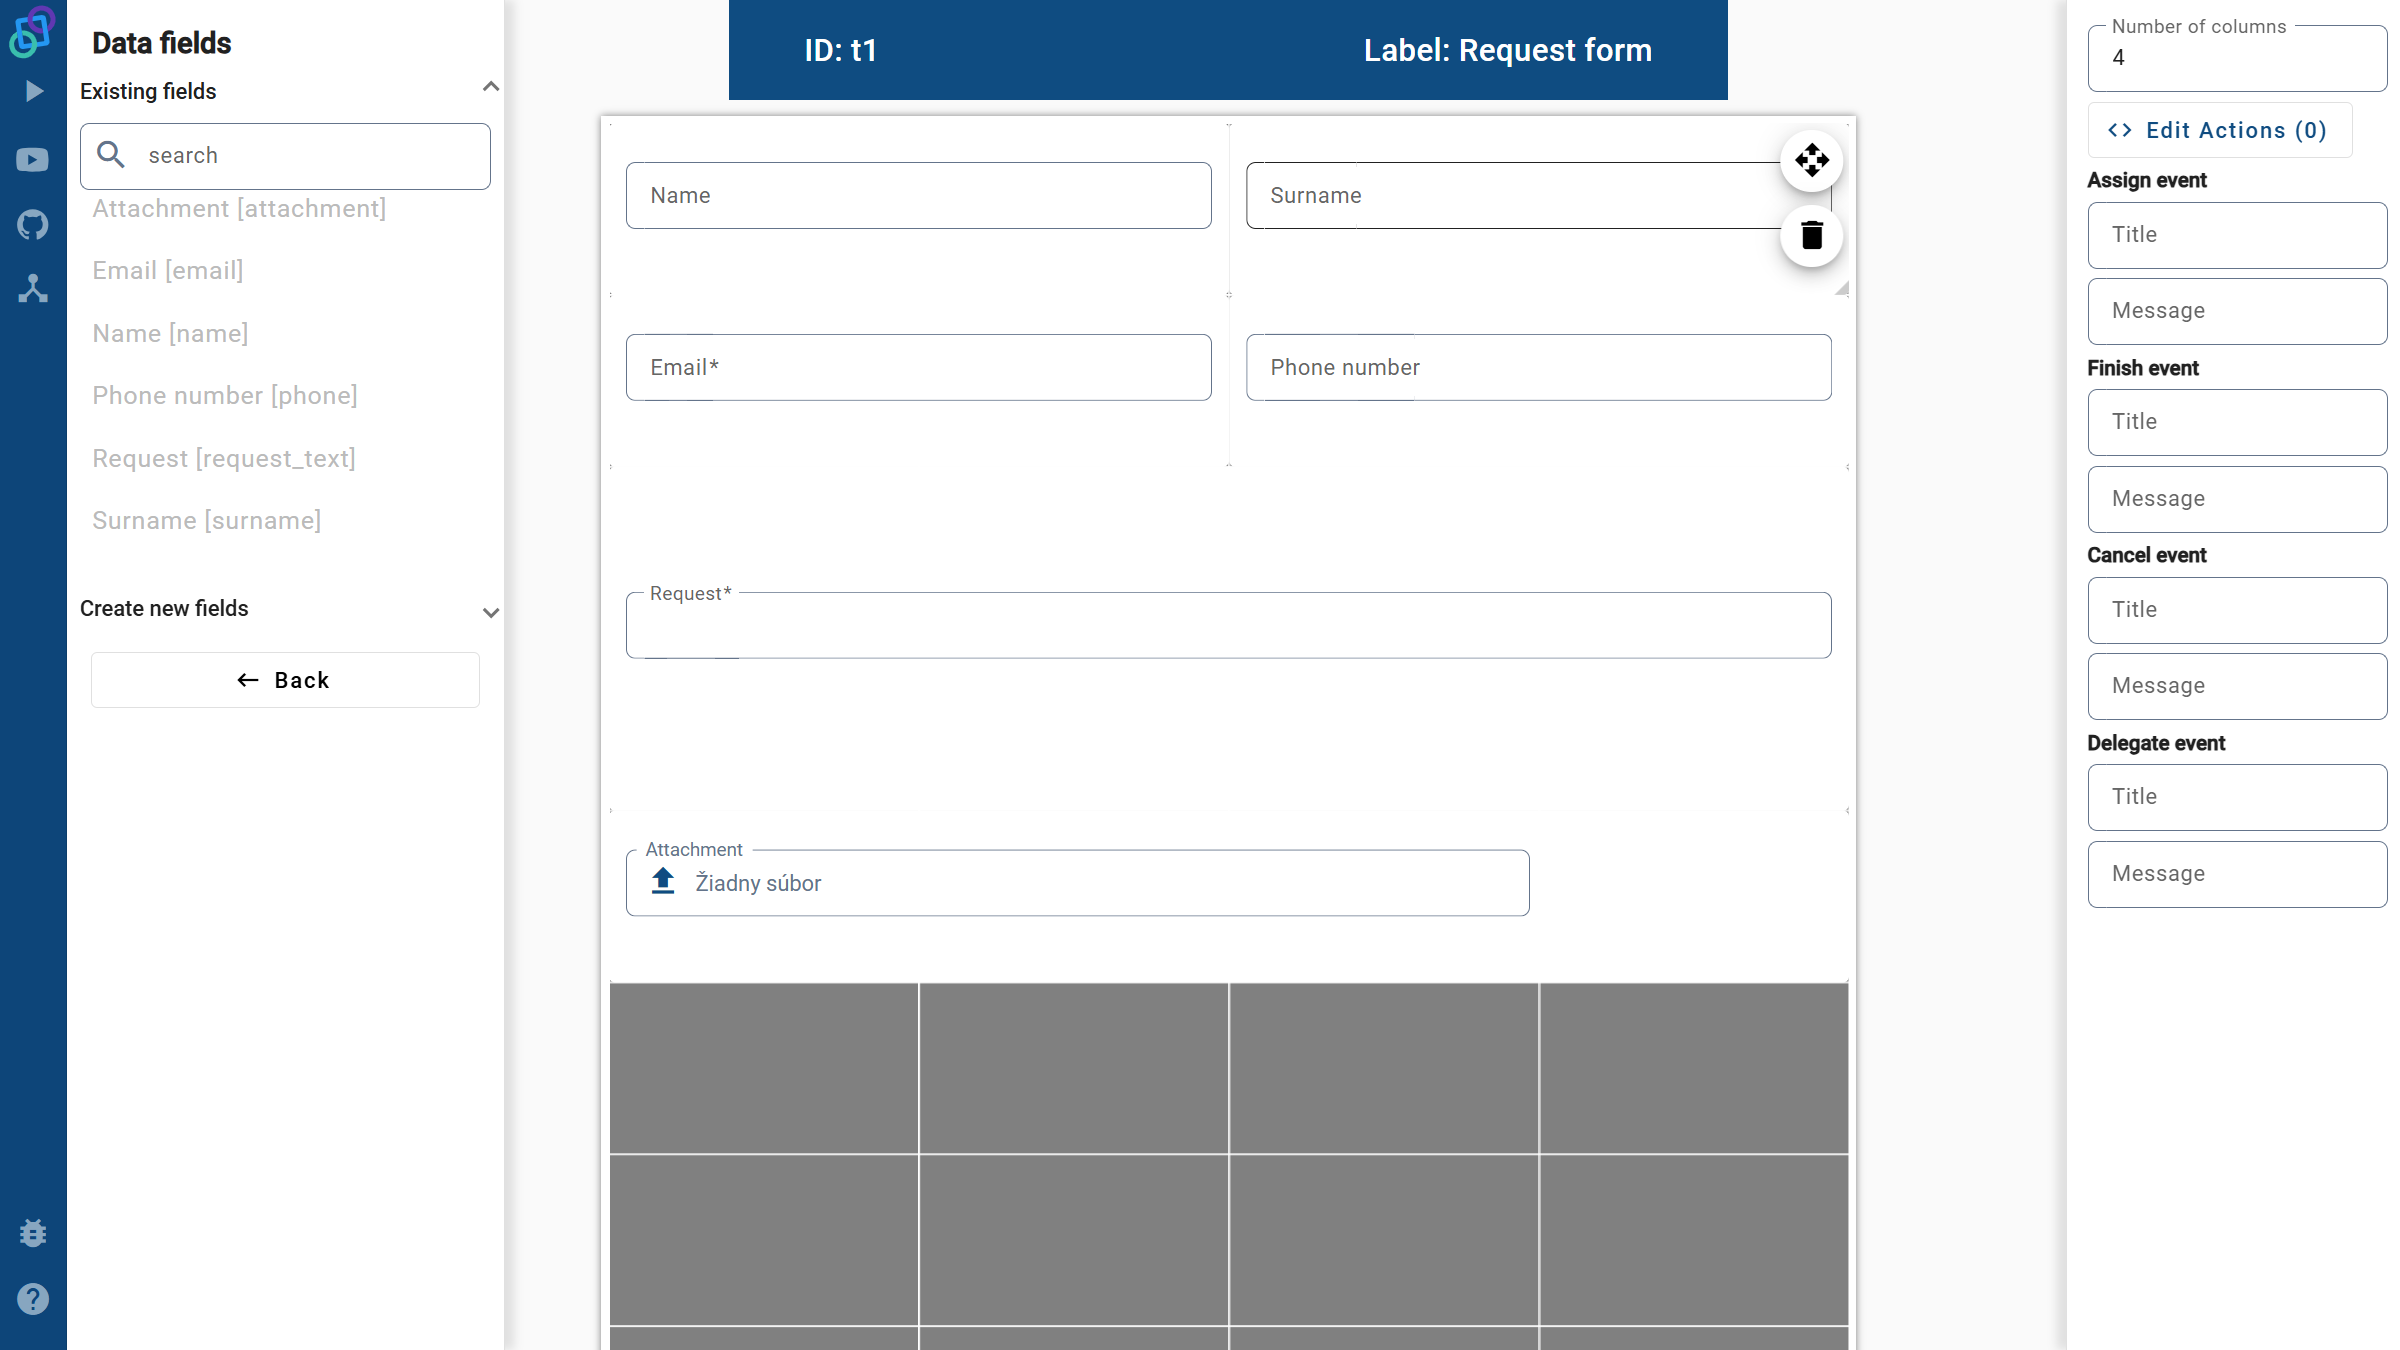
2️⃣ Form Layout
4-column grid showing Name / Surname, Email / Phone, Request (textarea), and Attachment (file preview).

Summary
You’ve successfully built your first Petriflow form:
- Clean 4-column grid layout with clear grouping
- Public access through anonymousRole
- Required fields and validation
- Auto-assignment for seamless process start
Next: Part 2 - Deploy to eTask and test your process in a live environment.